Projects
Note On My PIC Based Projects
I recently got involved in PIC programming after a friend at work pointed me in the direction of PICAXE. Originally designed for educational purposes I have found PICAXE can do loads of things useful in radio amateur and do it simply. PICAXE chips are cheap and the development, simulation and PIC downloading software, Programming Editor, is free! PICAXE works by running your code on top of PICAXE firmware (interpreter) blown onto the PIC chip, you can write your code directly in BASIC or you can produce code from creating flowcharts or building logic gates in the Programming Editor software, have a look http://www.rev-ed.co.uk/picaxe/.
Below are some of the projects I've done in PICAXE which other may find interesting or useful. Where possible I've provided my code for the projects which you are welcome to use and edit, but please let me know if you find it useful or if anything can be improved!
If you are interested in any of the projects but don't have the time, means or skill to make it send me an email and I will try and help were possible.
Anyway here are some of my PIC based projects (click on the titles for more info)...
This project is for a PIC based audio and PTT controller which has a single headset and foot-switch which can connect to upto 3 different ham radios at once for a single operator to simultaneously receive or transmit on any combination of the radios.
Flex Radio (PowerSDR) Icom Control
This project is to interface my Icom IC-910 to PowerSDR, the FlexRadio SDR control software, so when selecting a signal on the waterfall tunes the radio to the correct frequency. This translates the IF offset from the centre frequency in both PowerSDR and the IC-910 and commands the IC-910 to the new frequency.
Icom IC-910H Modification For Main Band IF Output
After looking about on various radio mod sites I was unable to find a modification to bring the main band IF (intermediate frequency) from my Icom IC-910 to a connector on the rear panel so I can monitor it on my Flex-1500 SDR. I worked out the best tap point and got it all working, I hope my info helps others trying to do the same.
PICAXE-20x2 Electronic Compass
A project which displays in large numbers the heading from a HMC6352 magnetic compass on a 4x20 LCD display and also outputs the direction in GS-232 format.
PICAXE-08M Based Standalone Automatic Voice Keyer
This project was created to add a simple cheap voice keyer to any radio which doesn't have one.
PICAXE-20M Based Icom Automatic Internal Voice Keyer
This project was created for my Icom IC-756pro3 radio which has an internal 4 channel voice keyer. The keyer is started manually from the radios menu however Icom also provide a means of starting a voice keyer on one of the MIC pins so I designed this project to automatically send a voice message with a variable time between each playback. It should also work with radios such as the Icom IC-7000.
PICAXE-20M Based DTMF to CW Temperature Probe
A proof of concept project to test using a PICAXE with DTMF, a temerature sensor and then sending the tealtime data by CW (morse code)...
PICAXE-28X1 Based Add-On For The LVB Tracker
I use an LVB Tracker for keeping my antenna pointing in the right direction, I decided I needed more functionality with it...
PICAXE-28X1 Based Rotator PC Interface
I needed a new interface for controlling my additional satellite antenna system from my PC, I designed one in less than 24 hours with a total component cost of less than £15...
PICAXE-18M & MXD2125 Based Elevation Feedback Module
A project using a PICAXE-18M, a Maxim IC DS1802 digital pot and an MXD2125 XY accelerometer to feedback the angle of elvation on my EME array.
PICAXE-18M Based D-Star Comms Chat
A simple ASCII keyboard to serial PICAXE-18M project, orignially designed for D-Star IM (instant messaging) but found some limitation on the RX side which I still need to work through - project details so far have been posted.
PICAXE-14M Based RF Control Logic For GB3PV
With the GB3PV ATV repeater in Cambridge being upgraded to digital we requred some logic to interface with the current hardware and the output between analog and digital by switching an RF relay from the analog TX to the digital TX.
PICAXE-08M Based Masthead Preamp Sequencer
To ensure I don't blow up my masthead preamp I built a sequencer for less than £20. It controls the order in which I switch my preamp, linear and IC-910 in and out during TX and RX.
PICAXE-20M DTMF, CAT, CI-V Keypad
Some of my radios don't have DTMF on them and I need it for working through echolink nodes and the like. I decided to make my own with PTT control, DTMF memories and the ability to control frequency and mode from it also.
D-Star DV-PR
A while back Darren G7LWT and myself worked on a DV Passive Repeater or DV-PR to allow 'talk-through' style operation for D-Star. The idea was dreamt up by Darren but required some PIC programming but Darren deserves the credit as he done alot of pre-design work. The DV-PR only repeats the raw received audio to a transmitter with the PIC doing the control, identing etc... This was more a proof of concept project which has led onto the next stage which is a Digital Voice Active Repeater or DV-AR. The DV-AR will demodulate the GMSK and apply FEC before re-transmission so the repeated signal is much more intelligible if the input signal is weak. From the DV-AR many projects will follow. Below is a video of the DV-PR in action using my IC-910 as the input/output radio with G1SAA transmitting on 144.6125Mhz and being re-broadcast locally on 438.6125Mhz. Likewise M1BXF is transmitting on 438.6125Mhz and back out on 144.6125Mhz.
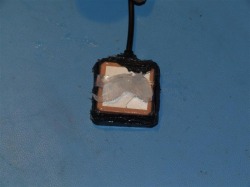
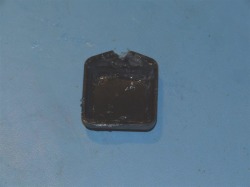
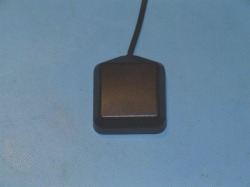
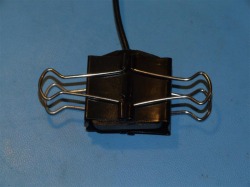
Waterproofing The IC-E2820 GPS Module
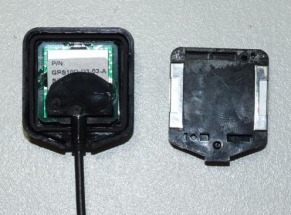
The Icom 2820 is a wonderful radio. However the designers seen fit not to waterproof the GPS antenna which comes as part of the UT-123 D-Star upgrade. I wanted to see how hard it was to waterproof myself and actually found it suprisingly easy. The top and bottom parts seperated with little effort to expose the GPS antenna which then came away from the top unit, as pictured left. The picture shows the GPS antenna in situe in the top half of the GPS plastics (antenna down). It then just required filling in all the spaces with a good dollop of silicone rubber sealant and fitting the 2 halves back together. I pre-filled mine so when I put the 2 halfs together the sealant was forced into all the spaces available, any bits which leaked out where just wiped off. Once together a couple of clips held it until it dried. I've now got a waterproof GPS antenna and it took 30 minutes to do including writing this article!
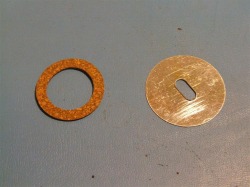
Repairing The Break On My G-400RC Rotator
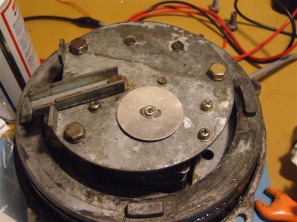
The break in my G-400RC rotator head fell off and got jammed in the gears, neadless to say it was mangled! I got a new along with break pads direct from Yaesu at a total cost of £0.33 per pad and £0.66 for the disk!!! The part codes for anyone interested are disk S8000136 and pad S8000135. Fitting is easy and while the rotator was on the bench I fitted a quick release waterproof Hirose HR30 connector. The rotator comes apprt fairly easily by removing 4 x 10mm bolts and lifting the lid off.
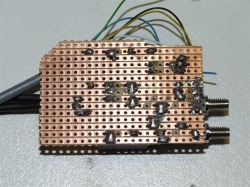
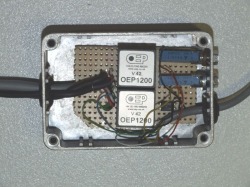
Sound Card Radio Interface
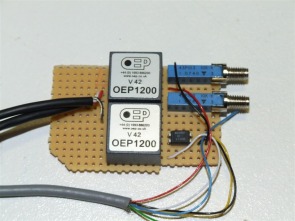
So after using nothing but a straight cable from my PC soundcard to the radio and from the radio to the PC soundcard I thought it was time to make a proper isolated interface. This is the MK1 vesrion but works fine with my Icom IC-910. The finished model includes a CI-V interface also but the workings for this are in the 9 way D connector which plugs into the PC and only the wires come into the interface box to be connected to the wires going to the radio.
It uses two 600Ohm 1:1 transformers, one on the TX path and one on the RX path. It also has an opto-isolator for PTT. In the MK2 version I'm going to look at opto-isolators for the CI-V/CAT connections too.
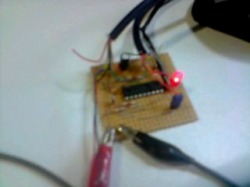
Time Lapse Camera Interface
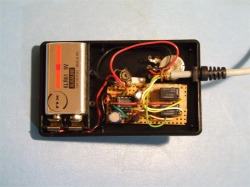
After seeing some interesting videos on YouTube showing sun rises and sunsets as a timelaps video I thought I would give it a go myself. I actually build this a year ago but only just got round to finishing it properly. Basically all I done was bought a resonably cheap camera of eBay (3.3mp) opened it and added some wires to the buttom so I could control it remotely. The problem is most digital cameras have a half pressed position where the camera focuses. For this I had to build the control circuit which would first activate one line to focus then another to take the shot. I ended up using a 555 timer, with a variable resistor to set the time between activations. The 555 controlled a relay but off the 555 I connected a transistor (via a diode for a bit of voltage drop) over a capacitor to activate another relay. I now had my 2 control lines.
I can now set the camera up to take pictures with approx 20 seconds delay or 140 seconds delay. Click on the images to see some example videos.

